
Understanding Time Lapse Video Recording
Time lapse video recording is a technique that captures a sequence of images at set intervals over a period of time, which are then played back at a higher speed to create a condensed visual representation of long-duration events. This method enables viewers to observe phenomena that happen gradually or slowly, such as sunrise solicitations, bustling urban scenes, or natural processes, in just a few seconds. The primary purpose of time lapse recordings is to illustrate change and motion that would otherwise be imperceptible in real-time, providing a compelling perspective for viewers.
Common applications for time lapse videos span various fields, including event documentation, scientific research, urban planning, travel storytelling, and artistic expression. For event videographers, capturing the progression of a wedding setup or an exhibit installation provides a dynamic overview in a condensed format. Scientists utilize time lapse footage to monitor the growth of plants, the movement of wildlife, or changes in geological features. Urban developers often record construction sites or traffic flow to analyze progress or identify patterns. Additionally, digital platforms and social media have popularized time lapse content, making it a favorite tool for engaging storytelling.
Achieving high-quality time lapse videos involves understanding the core principles of frame capture, interval selection, and playback speed. The fundamental concept is to decide how frequently images should be taken — for example, one frame every second, every few seconds, or even every minute—depending on the scene’s expected rate of change. These images are then stitched together during post-production, creating the illusion of accelerated motion. Proper planning and equipment selection are essential to capturing smooth, professional-looking results, especially when recording in outdoor environments or dynamic settings.
Typically, time lapse videos serve to emphasize the passage of time, highlight process flow, or showcase transformations with clarity and impact. They can dramatically enhance storytelling by revealing patterns, revealing unseen phenomena, or simply providing viewers with a new appreciation of the world’s natural and man-made environments. Understanding the fundamental aspects of time lapse video recording ensures creators can produce compelling content that captures attention and communicates their intended message effectively.
In the following sections, an in-depth examination of the different types of time lapse recordings, essential equipment, setup procedures, camera configurations, capturing techniques, post-production strategies, and sharing tips will guide both beginners and seasoned videographers in mastering this unique visual art form.
Choosing the Appropriate Equipment for Time Lapse Video Recording
Producing high-quality time lapse videos requires more than just patience; it demands the right set of tools tailored to the scene and desired outcome. While many enthusiasts rely on standard cameras or smartphones with built-in time lapse functions, professional productions often utilize specialized equipment to ensure consistency, control, and superior image quality.
Key equipment includes:
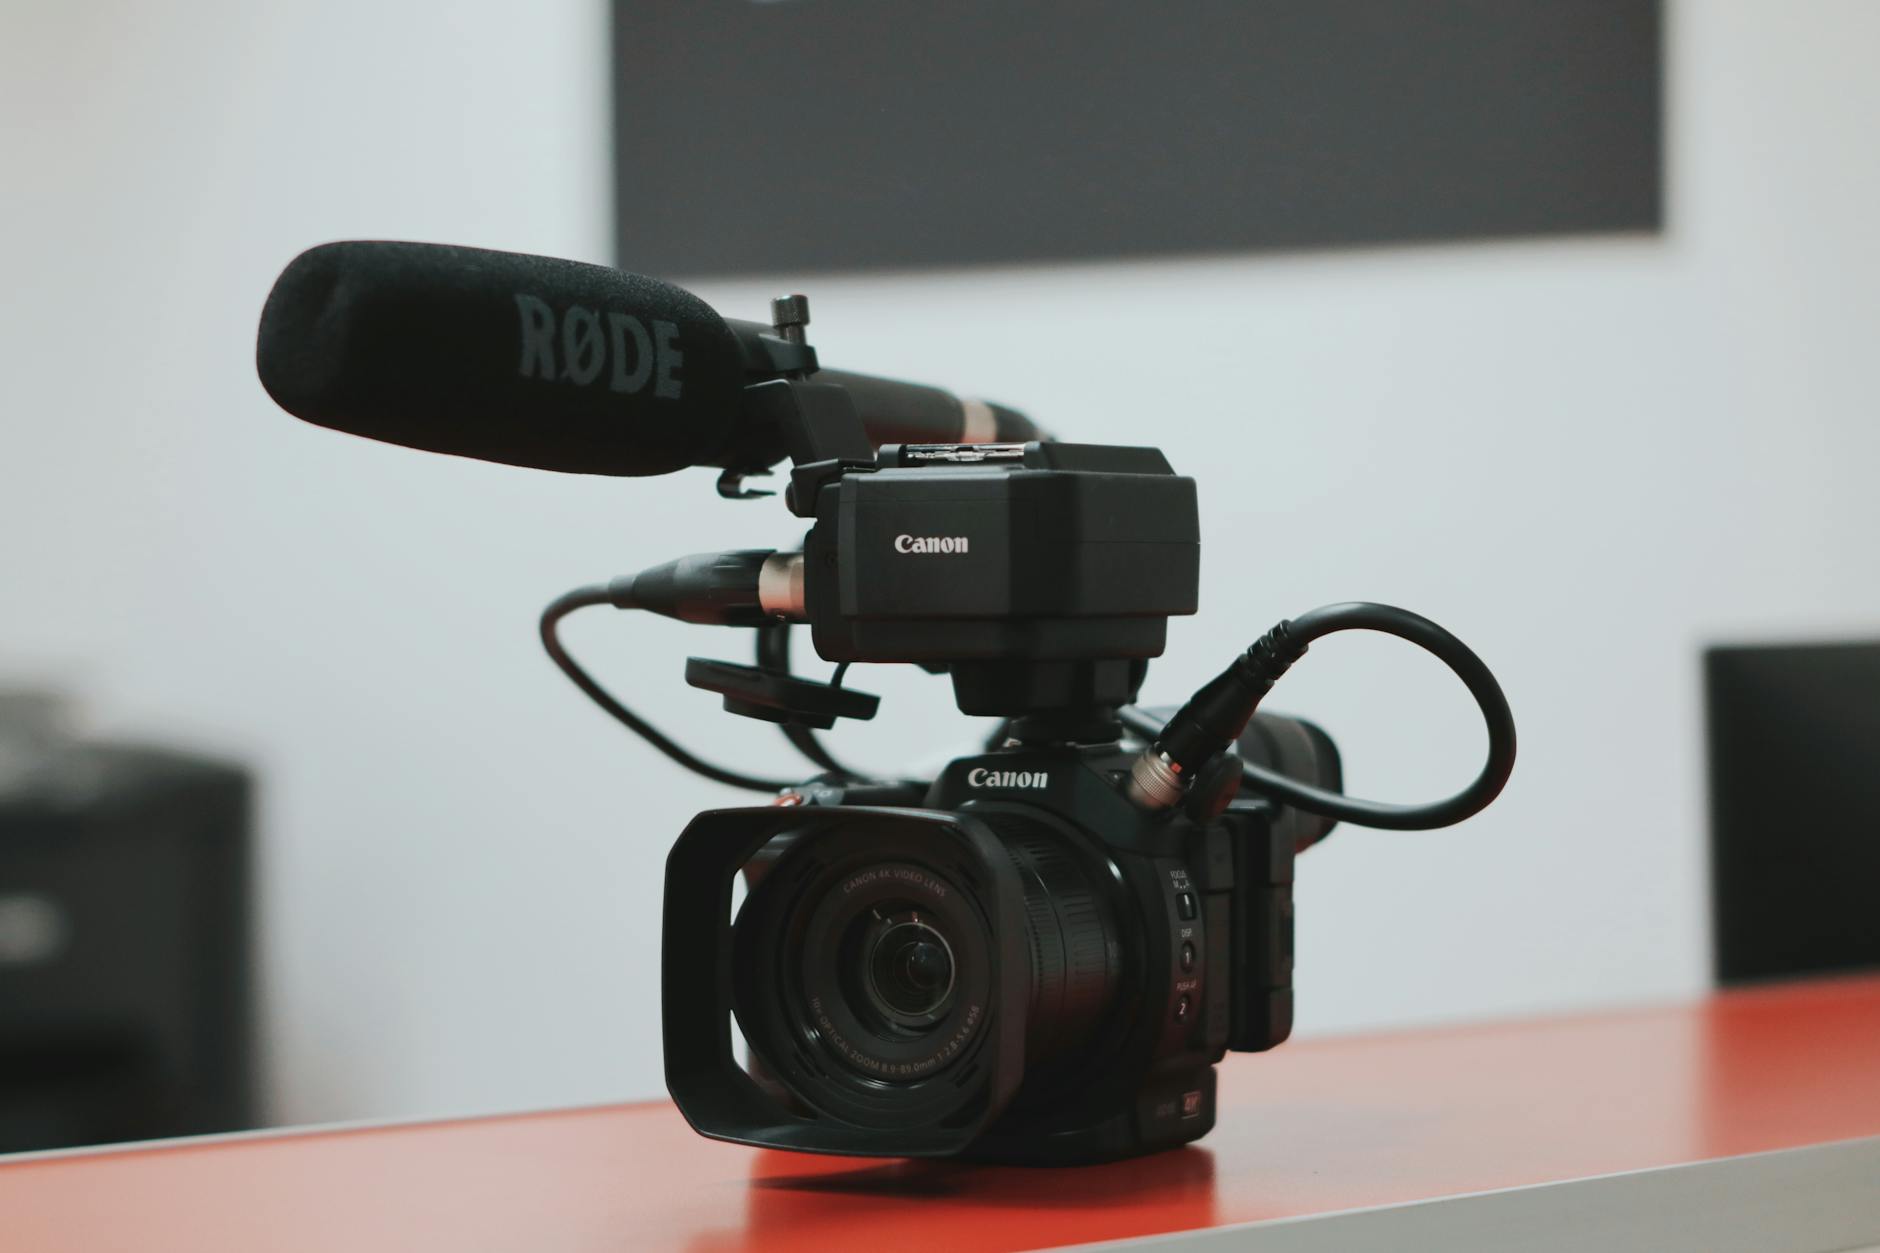
- Digital Cameras with Intervalometer: These cameras allow precise control over capture intervals and exposure settings. Many advanced DSLRs and mirrorless models have in-built intervalometers or can connect to external ones, offering flexibility for complex shooting scenarios.
- Automated Time Lapse Controllers: External intervalometers or dedicated controllers provide versatile options to set custom capture intervals, trigger multiple cameras simultaneously, and manage long-duration shoots effectively.
- Tripods and Stabilization Gear: Stability is paramount in time lapse recording. Heavy-duty tripods or gimbals ensure minimal camera movement, preventing unwanted jitter and maintaining consistent framing throughout the shoot.
- Lenses: Wide-angle lenses are popular for capturing expansive landscapes and cityscapes, while zoom lenses can be used to focus on specific subjects, adding depth and dynamism to the footage.
- Power Adaptors and Extra Batteries: Since time lapse recordings can span hours or even days, utilizing AC power sources or high-capacity batteries helps maintain continuous operation without interruptions.
- Remote Monitoring and Control Devices: Wireless remote controls or apps facilitate adjustments in camera settings or framing without disturbing the setup, especially useful during long-term recordings.
Optimal Camera Settings to Enhance Time Lapse Recording
To produce visually appealing time lapse videos, fine-tuning camera settings is crucial. Proper configuration minimizes potential inconsistencies and ensures that the footage will seamlessly integrate during post-production.
Consider the following:
- Interval Duration: The interval between each shot depends on the scene’s rate of change. For moving clouds or flowing water, intervals ranging from 1 to 5 seconds work well. For slower transformations, longer intervals like 30 seconds or more are suitable.
- Aperture and ISO: Using a small aperture (high f-number) increases depth of field, keeping more of the scene in focus, while maintaining low ISO settings for clean images with minimal noise.
- Shutter Speed: Adjust this based on light conditions. For well-lit scenes, fast shutter speeds prevent overexposure; for darker environments, slower speeds combined with increased ISO may be necessary.
- Focus Mode: Lock focus before recording begins to prevent autofocus adjustments that can cause flickering in the final video.
Precise Scene Setup and Composition
Preparation plays a pivotal role in achieving crisp, compelling time lapse videos. Selecting the right vantage point and framing ensures that the scene's most dynamic aspects are captured effectively.
Steps to optimize scene setup include:
- Scout the Location: Evaluate light conditions, movement patterns, and potential obstructions. Consider the best angles to showcase the scene’s transformative qualities.
- Stabilize the Camera: Secure the camera on a sturdy tripod, ensuring stable positioning. Use leveling tools to maintain horizon accuracy if necessary.
- Set Composition: Frame the scene thoughtfully, leaving room for movement or changes that can enhance storytelling.
- Control Environment Variables: Minimize vibrations, control lighting effects if needed, and consider weather protection for outdoor shoots.
Implementing these technical and preparatory measures ensures that the resulting time lapse footage is smooth, well-exposed, and visually captivating, setting a professional standard that resonates with viewers and clients alike.
Choosing the Right Equipment for Time Lapse Recording
To achieve optimal results in time lapse video recording, selecting appropriate equipment is crucial. While smartphones offer built-in functionalities that simplify the process, dedicated cameras such as DSLRs, mirrorless models, and action cameras like GoPros provide advanced control and superior image quality. The choice depends on the project's scope, desired quality, and environmental conditions.
Essential tools include:
- Camera Devices: DSLR, mirrorless, or GoPro cameras with manual settings
- Intervalometers: External devices or accessories integrated into cameras to automate interval shots
- Tripods and Supports: Sturdy tripods or stabilization rigs to prevent unwanted camera movements
- Additional Accessories: Lens filters, weather protection gear, and extra batteries to ensure uninterrupted shooting
Configuring Camera Settings for Consistent Results
Proper configuration of camera settings is fundamental in producing seamless time lapse videos. It involves meticulous adjustments to exposure, focus, and interval timing to accommodate varying lighting conditions and scene dynamics.
- Manual Exposure Settings: Lock ISO, aperture, and shutter speed to maintain consistency throughout the shoot, especially in changing light environments.
- Focus Mode: Use manual focus to prevent fluctuations caused by autofocus adjustments during recording sessions.
- Interval Timing: Select appropriate interval durations, typically ranging from 1 second for fast-moving scenes to several minutes for slow changes, based on the desired final playback speed.
- White Balance: Set manually or use a fixed setting to avoid color shifts between frames.
Implementing Effective Time Lapse Techniques
Beyond equipment and settings, technique plays a vital role in capturing compelling time lapse footage. Consistency in camera positioning and exposure ensures a cohesive visual narrative, while environmental considerations guard against unforeseen disruptions.
- Pre-Plan the Scene: Conduct thorough scouting to identify the best vantage points, lighting conditions, and subject movements.
- Secure the Camera: Use high-quality tripods or stabilization gear, and verify that the camera is level and firmly attached to prevent shifts during recording.
- Control Environmental Variables: Minimize vibrations, shield equipment from wind or rain, and avoid interference from moving objects not intended for the shot.
- Test and Adjust: Perform test shots to verify camera settings, composition, and stability before commencing the full sequence.
Post-Production Considerations
After capturing the footage, professional editing ensures a polished final product. Adjustments in exposure, color grading, and frame rate in editing software help enhance visual appeal and narrative clarity. Proper sequencing and timing of frames also facilitate smooth playback and storytelling.
Equipment and Tools for Recording
Choosing the right equipment is crucial for capturing high-quality time lapse videos that meet professional standards. An essential component is a camera capable of interval shooting, whether that be a dedicated time lapse camera, a DSLR, or mirrorless models with time lapse functionality. These cameras allow precise control over shooting parameters, which is vital for consistency across frames.
Stability is equally important, as even minor camera shifts can disrupt the visual flow of the sequence. Using a sturdy tripod or specialized stabilization rig ensures the camera remains fixed during extended recording sessions. For scenes vulnerable to environmental interference, such as wind or vibrations, additional stabilization accessories like weighted tripods or gimbals can be employed to maintain a steady shot.
In addition to core equipment, accessories like remote shutter releases or intervalometers come with many cameras, enabling automated shooting at specified intervals without manual intervention. They help minimize human contact with the camera during recording, reducing the risk of vibrations or accidental movement. External power sources or high-capacity batteries are recommended for long-duration shoots, preventing interruptions due to power depletion.
Moreover, protecting the equipment against environmental factors is vital. Weatherproof casings or covers can shield cameras from rain, dust, and extreme temperatures, ensuring consistent performance throughout the shoot. For outdoor scenes, consider using neutral density filters to control exposure during bright conditions, preventing overexposure and maintaining optimal image quality.
Proper planning of each piece of equipment before stepping into the field guarantees smooth operation and reduces technical issues that could compromise the final footage. Ensuring compatibility between all accessories, especially when combining different brands or models, is a key consideration to streamline the setup process.
Ultimately, the success of a time lapse recording depends heavily on the reliability and suitability of the tools used. Investing in high-caliber equipment tailored for time lapse shoots not only facilitates capturing precise frames but also simplifies post-processing by providing stable and consistent footage. When preparing for a shoot, assess scene requirements thoroughly to select the best combination of cameras, stabilization, and accessories, ensuring the final product meets your creative and technical expectations.
Choosing the Right Camera Settings for Optimal Results
Configuring your camera settings appropriately is crucial for producing a high-quality time lapse video. Resolution plays a vital role; selecting a high-definition setting, such as 1920x1080 pixels or higher, ensures clarity and detail that will translate well during playback. Maintaining a consistent resolution throughout the shoot preserves visual uniformity and simplifies post-processing.
Frame rate selection influences the smoothness of the final video. Typically, setting your camera to record at 24 or 30 frames per second provides natural motion appearance. Keep in mind that the number of frames captured per interval affects the speed of the motion when played back at standard frame rates. For instance, capturing fewer frames per second results in a faster playback, ideal for scenes like traffic flow or cloud movement.
Exposure settings, including shutter speed, aperture, and ISO, must be meticulously adjusted to adapt to changing lighting conditions. A low ISO reduces noise and enhances image quality, which is essential for professional projects. Aperture adjustments can control depth of field, focusing attention on specific scene elements, while shutter speed should be aligned with frame rate and scene brightness to prevent motion blur or overexposure.
Focus consistency is another critical factor. Utilizing manual focus ensures focal points remain static during recording, avoiding unintended shifts that can disrupt the viewing experience. If your camera supports autofocus, consider locking focus at the beginning of the session to maintain clarity throughout the shoot.
Additional parameters, such as white balance, should be preset to prevent color shifts due to fluctuating lighting. Shooting in RAW format allows for greater flexibility in post-production, enabling precise adjustments without quality loss. Carefully planned camera settings tailored to your scene's conditions will significantly impact the final product, delivering a smooth, visually appealing time lapse video.
Implementing Proper Frame Intervals
Determining the appropriate interval between shots is fundamental for capturing the intended motion speed. The interval duration depends on the scene, the speed of the motion, and the desired output playback rate. For example, slow processes like plant growth may require intervals of 10-30 minutes, whereas fast-moving scenes such as bustling city streets may benefit from intervals of 1-5 seconds.
For dynamic outdoor environments, weather conditions and lighting fluctuations should influence interval planning. Using a flexible intervalometer, which can automatically adjust shooting intervals based on scene activity or lighting, can improve efficiency and capture more consistent footage.
When selecting intervals, remember that longer durations between shots result in faster perceived motion, while shorter intervals produce more detailed and smoother sequences. Experimenting with test runs to find the optimal interval will help ensure the final video accurately reflects the scene's dynamics and your creative vision.
Final Tips for a Successful Shooting Session
Consistency is the cornerstone of quality time lapse footage. Regularly check camera settings and battery life, especially during extended shoots. Use a stable tripod to eliminate unwanted camera shake, which can detract from the professional appearance of your project. Weatherproof your equipment when shooting outdoors to prevent damage from elements like rain or dust.
Ultimately, thorough preparation, precise configuration, and an understanding of scene-specific requirements are fundamental to capturing compelling time lapse videos. Employing high-quality gear and paying attention to every detail during the setup phase will set the foundation for stunning results that do justice to the passage of time you aim to showcase.
Understanding Time Lapse Video Recording
Time lapse video recording captures a sequence of images over a prolonged period and compiles them into a short, accelerated video. This technique effectively illustrates processes that are usually imperceptible to the human eye, such as sunrise developments, bustling cityscapes, or blooming flowers. A well-executed time lapse not only demonstrates technical competence but also enhances storytelling by portraying the passage of time in an engaging, concise format. Precise control over camera parameters is crucial to producing seamless footage that accurately reflects the scene's dynamics.
Official Methods for Recording Time Lapse Videos
There are two primary, officially recognized methods to capture high-quality time lapse videos, each suited to specific scenarios and equipment capabilities:
- Using Intervalometers: An intervalometer is a specialized device that triggers the camera shutter at set intervals. This method allows for meticulous control over frame rate and intervals, which is essential for scenes with steady motion or changing lighting conditions. Many cameras, especially DSLRs and mirrorless models, support external intervalometers either via dedicated ports or wireless connections. When using this approach, it’s important to select fixed intervals that match scene dynamics—ranging from fractions of a second to several minutes—depending on the desired effect.
- Employing Built-In Camera Functions: Modern digital cameras and smartphones often come equipped with built-in time lapse modes. These features automate the entire process by managing intervals, exposure, and focus settings internally. They are especially user-friendly for amateurs and quick projects, providing reliable results without additional hardware. Nonetheless, understanding how to optimize these modes—such as setting appropriate intervals considering scene motion and lighting—is vital for professional-quality output.
Additional Techniques for Professional Results
Beyond standard methods, professionals may combine software solutions and hardware accessories for advanced control. For instance, using compatible remote apps can enable real-time adjustment of intervals and settings during shooting. Integration of GPS data can coordinate time lapse sequences with geographic features, adding a layer of contextual accuracy. Furthermore, employing weatherproof enclosures and stable mounting systems ensures durability and stability, especially during outdoor shoots. These legitimate techniques maximize the potential of official equipment to deliver consistent, high-end results.
Capturing a compelling time lapse requires adherence to documented procedures and the use of approved tools designed for this purpose. Proper planning—including scene analysis, lighting considerations, and equipment calibration—ensures the final video precisely portrays the intended passage of time. By employing authorized methods and maintaining high standards during the recording phase, creators can produce captivating footage that showcases the nuances of movement and change over extended durations.
Choosing the Right Method for Recording a Professional Time Lapse Video
When aiming for high-quality, reliable results in time lapse video recording, selecting an official and validated method is essential. This ensures not only the precision of the capture process but also the consistency needed for seamless footage that accurately portrays the intended passage of time. Employing recognized hardware and software solutions aligns with industry best practices, providing creators with greater control and improving the final output’s visual impact.
Utilizing Certified Intervalometers and Remote Control Devices
One of the key components for professional time lapse recording is the use of certified intervalometers. These devices, expertly designed for camera control, allow precise timing in capturing frames at predetermined intervals. High-end models often come with features such as customizable pacing, advanced delay options, and synchronization capabilities with multiple cameras, which are critical for complex shoots. When paired with compatible remote control systems or smartphone apps that are approved by camera manufacturers, operators gain the ability to adjust settings in real-time, ensuring optimal performance throughout the session.
Employing Weatherproof and Stabilized Mounting Hardware
Outdoor shoots demand durable, weatherproof mounting solutions that do not compromise stability. Utilizing tripod systems and mounts that are specifically designed and tested for professional use ensures minimal vibrations and shift during prolonged recording sessions. Professional-grade tripods incorporate features such as adjustable legs, fluid heads, and quick-release mechanisms that facilitate precise camera positioning. Incorporating vibration dampers or stabilization gimbals further enhances the smoothness of the resulting footage, especially when capturing scenes with extreme movement or environmental factors like wind or vibrations.
Implementing Continuous Power Supply Solutions
Time lapse recordings often extend over hours, requiring reliable power sources. Using approved external power adapters, battery packs, or AC power supplies ensures uninterrupted operation. Properly configured power solutions must meet the specifications provided by camera manufacturers to prevent damage or malfunction. Equipment with built-in overcurrent protection and proper insulation safeguards the recording process, preventing data loss or hardware failure during critical moments.
Documentation and Calibration of Equipment
Prior to shooting, calibration of all equipment components is crucial. This includes verifying camera settings, confirming intervalometer accuracy, confirming time synchronization, and ensuring stable mounting. Documenting these processes allows for consistency across multiple shoots and facilitates troubleshooting if needed. Rigorously following documented procedures helps maintain high standards, ensuring each frame is captured under optimal conditions.
Utilizing Software for Monitoring and Adjustment
During the shoot, some reputable camera and hardware manufacturers provide dedicated software applications compatible with their equipment. These software solutions enable real-time monitoring of the recording process, allowing operators to make adjustments to intervals, exposure settings, or focus controls remotely. Using software verified by the device manufacturer ensures integrity and reduces the risk of errors that could compromise the sequence’s quality.
Ensuring Data Management and Storage Compliance
High-capacity, fast-read memory cards and reliable data storage systems are integral to professional recording. Using approved memory modules that meet the camera manufacturer’s specifications guarantees smooth data transfer and minimizes corruption risks. Consistent data management, including regular backups and file organization, prevents loss of valuable footage, setting the stage for efficient post-production processing.
Summary of Professional Methods
- Use of certified intervalometers and remote control devices approved by camera manufacturers
- Stable, weatherproof mounting hardware with vibration damping features
- Reliable power solutions suitable for extended recording durations
- Calibration and documentation of all equipment settings prior to shooting
- Utilization of manufacturer-approved software for monitoring and adjustments
- Implementation of high-capacity, compliant data storage systems
Adhering to these verified, legal methods of recording a time lapse ensures that footage is captured with high fidelity, stability, and consistency. Such rigorous methodology maximizes the potential of certified equipment and aligns with industry standards, resulting in time lapse videos that are both captivating and reliable.
Ensuring Accurate Data and Final Output Quality in Time Lapse Video Recording
Securing high-quality results in time lapse video recording requires meticulous attention to data accuracy and post-production refinement. When capturing footage, it is essential to verify that data transfer processes are intact and free from corruption, which can compromise the integrity of the sequence. Using professional-grade, approved storage media and maintaining rigorous backup protocols ensures that raw footage remains pristine and accessible for editing.
Camera calibration before each recording session plays a vital role in producing consistent, professional results. This involves setting the correct frame rate, exposure, focus, and white balance, tailored to the environmental conditions. Documenting these settings provides a reference for future shoots and guarantees uniformity across longer sequences or multiple sessions.
Post-Production Techniques for Enhancing Time Lapse Footage
Once data collection is complete, the editing phase involves several technical steps to enhance visual appeal and ensure smooth playback:
- Frame rate adjustment: Standard playback is typically 24 or 30 frames per second. Properly encoding the sequence at the correct frame rate prevents jitter and irregular motion.
- Color correction and grading: Fine-tuning exposure, contrast, saturation, and white balance brings vibrancy and consistency to the footage, making it more visually engaging.
- Stabilization: Even minor vibrations can disrupt the seamless flow of a time lapse. Applying stabilization algorithms helps maintain a steady shot, especially when footage is captured with handheld or imperfect mounts.
- Speed adjustments: Sometimes, speeding up or slowing down segments accentuates specific moments or transitions, emphasizing the passage of time effectively.
- Transitions and effects: Incorporating transitions or overlays can add narrative elements or visual interest, provided they complement the core footage without distracting from it.
Professional editing software ensures these adjustments are performed with precision, preserving the high fidelity of the original shoot while elevating the overall aesthetic. Incorporating expert color grading and stabilization techniques results in a polished, captivating final product that accurately represents the passage of time.
Exporting and Sharing Your Time Lapse Video
Choosing the appropriate export settings guarantees that the video remains of high quality when shared across various platforms. Utilizing codecs such as H.264 or H.265 balances high-resolution output with manageable file sizes, ensuring smooth playback on different devices and streaming services.
Optimizing video resolution based on the target platform enhances visibility and engagement. For social media, optimizing for vertical or square formats may improve viewer interaction, while for professional presentations, full HD or 4K outputs preserve detail and clarity.

Understanding and implementing these legitimate, industry-approved steps in data management and post-production is fundamental. They ensure that every frame captures the intended moment with precision and that the final video exudes clarity, stability, and visual appeal, effectively conveying the passage of time to viewers.